Fundamentals of JavaScript
Introduction
In this lesson, we’ll be exploring the basics of JavaScript’s syntax. You’ll learn what types and variables are and how to declare them, how to perform arithmetic operations, what strings are, and more.
Get your fingers ready, we’ll be writing some code!
Note: Some concepts which are explained in later lessons will be mentioned in this article. We tried to avoid that as much as possible, but it indeed proved difficult. It is recommended to come back to this lesson after finishing some of the others to truly grasp some of the material.
Types
First up are types, which refer to categories of values that can be assigned and manipulated. There are seven primitive types: Number, String, Boolean, Undefined, Null, Symbol, and BigInt. If numbers are the fundamental building blocks of mathematics, then types are the fundamental building blocks of JavaScript.
Primitive Types
The most basic types we have in JavaScript are primitive types. Primitive types are immutable, which means their values cannot be changed. There are 7 primitive types in JavaScript, of which we’ll explore below.
However, before we begin, lets take a look at the typeof operator.
The typeof operator allows you to check the type of a value. For a quick example, if we ran typeof 3.14 in the console, you should see "number" returned. As you read through the list, try using typeof in the console on different values.
Number
Represents both integer and floating-point numbers. There’s not a whole lot to say about numbers, as you are already familiar with them – they include values such as 42 and 3.14.
String
Strings represent a sequence of characters used to store and manipulate text. Strings are enclosed in single quotes (''), double quotes (""), or backticks(``).
"This is a string.";
"This is also a string."`And this too, is also a string.`;
Boolean
Represents a logical entity and can have only two values: true or false.
Undefined
A variable that has been declared but has not yet been assigned a value has the value undefined.
Null
Represents the intentional absence of any object value. It is one of JavaScript’s primitive values.
NaN
NaN means “Not a Number”, however, it is type of… a number. NaN represents a value that is not a legal number. It is typically the result of an operation that cannot produce a meaningful numeric result.
typeof NaN; // number
Symbol
Represents a unique and immutable value often used as a key for object properties. Created using the Symbol() function. (More on objects later.)
BigInt
Represents whole numbers larger than the Number type can handle. Created by appending n to the end of an integer literal or by calling the BigInt() function.
Note: Aside from these types, there are also objects, of which we will be discussing in the next lesson.
Arithmetic Operators
This will probably be the easiest topic for you to grasp, as you are already familiar with arithmetic operators. Study the table below and make a note of things you may be unfamiliar with (such as the Modulus operator).
| Operator | Description | Example | Result |
|---|---|---|---|
+ |
Addition | 5 + 3 |
8 |
- |
Subtraction | 5 - 3 |
2 |
* |
Multiplication | 5 * 3 |
15 |
/ |
Division | 5 / 3 |
1.6666666666666667 |
% |
Remainder (Modulus) | 5 % 3 |
2 |
** |
Exponentiation (ES2016) | 5 ** 3 |
125 |
++ |
Increment | let a = 5; a++ |
6 (returns 5 before increment) |
-- |
Decrement | let a = 5; a-- |
4 (returns 5 before decrement) |
- |
Unary negation | -5 |
-5 |
+ |
Unary plus | +"5" |
5 (converts to number) |
Don’t worry if you haven’t seen some of these characters before, as we’ll be exploring them all in depth. But for now, let’s take a look at how we might use some of these for things you are probably unfamiliar with.
In JavaScript (and most other programming languages), we can add strings together. That seems a bit odd, but it’s nothing really complex. This is called string concatenation.
"Hello, " + "reader";
If you enter this in your console, you will see that it simply returns “Hello, reader”. That’s one such way of concatenating strings. We can also use template literals. Template literals are extremely helpful for when we have a variable (more on variables down below) that needs to be displayed with some text.
let days_coding = 1;
To access the value of this variable, you can do something like this:
`You have been coding for ${days_coding} day!`;
Intuitively, we can see that the message will be ‘You have been coding for 1 day!’, as the variable has the value of 1. To use a template literal, you must use the backticks. Any variable will need to be wrapped within ${}.
Without template literals, we would have to use the addition symbol in a tedious manner, like this:
"You have been coding for " + days_coding + " day!";
Both ways are valid, although the latter is a bit more concise and easier to follow.
We didn’t learn about variables yet, so lets do that now. Feel free to come back to this section after learning about variables.
Comparison Operators
Comparison operators in are used to compare two values and return a boolean (i.e. true or false) based on the comparison. They are essential for making decisions in your code, allowing you to execute different code blocks depending on the comparison results.
| Operator | Description | Example | Result |
|---|---|---|---|
== |
Equal to (type conversion is allowed) | 5 == '5' |
true |
=== |
Strict equal to (no type conversion) | 5 === '5' |
false |
!= |
Not equal to (type conversion is allowed) | 5 != '5' |
false |
!== |
Strict not equal to (no type conversion) | 5 !== '5' |
true |
> |
Greater than | 5 > 3 |
true |
< |
Less than | 5 < 3 |
false |
>= |
Greater than or equal to | 5 >= 5 |
true |
<= |
Less than or equal to | 5 <= 3 |
false |
? : |
Ternary operator | 5 > 3 ? 'yes' : 'no' |
'yes' |
While it’s worth noting its existence, the first operator on the list should not be used when you are developing software. If you look at the example, you will see why. Using == to compare a number value, 5, to a string value, ‘5’, will indeed return true. This is because of something known as type conversion (also known as Type Coercion). Simply put, type conversion is the process of one type being converted into another. It is recommended to always use the strict equality operator, ===.
Using the strict equality operator in place of the equal to operator will indeed return false.
5 === "5"; // false
Logical Operators
Logical operators are fundamental elements in programming and mathematics that allow for the combination and manipulation of Boolean values (i.e. true or false).
| Operator | Description | Example | Result |
|---|---|---|---|
&& |
Logical AND | true && false |
false |
|| |
Logical OR | true || false |
true |
! |
Logical NOT | !true |
false |
?? |
Nullish Coalescing | null ?? 'foo' |
'foo' |
?. |
Optional Chaining | obj?.prop |
undefined if obj is null or undefined |
// false
5 === 5 && 2 + 3 === 1;
// true
3 + 3 === 2 || 1 + 1 === 2;
// true
!false;
The other operators are not as simple to explain as those three above, nonetheless, we’ll take a peak at the last two.
let user;
let defaultUser = "Guest";
let currentUser = user ?? defaultUser;
console.log(currentUser); // "Guest"
We will be discussing variables down below, so you may have to revisit this one. However, the ?? operator checks the left hand value. If it is null or undefined, it will return the value on the right – in this case, that would be defaultUser.
So, the code runs and it asks is user defined? If it is, set currentUser to its value. If it’s not, set defaultUser to currentUser.
Variables
You might recall algebra class when you were in grade school. The teacher declared that 2 + x = 5. In this case, they told you that x was a variable, an unknown value that you have to find. Well, that’s quite different from the variables that we’ll be working with.
We set their values to whatever we need them to represent, rather than trying to find them. When we set their values, we use one of the types listed above. There are 3 keywords in JavaScript that allow you to declare variables: var, let, and const. var is pre-ES6, the version of JavaScript that was released in 2015, and the version we’ll be using thoughout these courses. Modern JavaScript developers will forbid the use of var altogether, as it has some scoping issues. We’ll talk more about scoping in a later lesson, but for now, just know that we won’t be declaring variables with the var keyword. We’ll be declaring our variables with let and const.
So what are let and const? In short, they are keywords that allow us to declare variables. The difference between the two is that let is able to be changed, while const isn’t. What exactly does that mean?
We can use an analogy, such that const is like setting a piece of concrete – you can’t change its shape or location once it is set. On the other hand, let is like molding clay – you can reshape it around as much as you’d like.
Lets take a look at some variable declarations below:
// Setting a variable with const
const name = "Bob";
// Setting a variable with let
let age = 30;
Note: The sentences above beginning with ‘//’ are comments. They’re basically messages for other humans to read. The JavaScript interpreter will ignore them.
Let’s take a look at what’s going on:
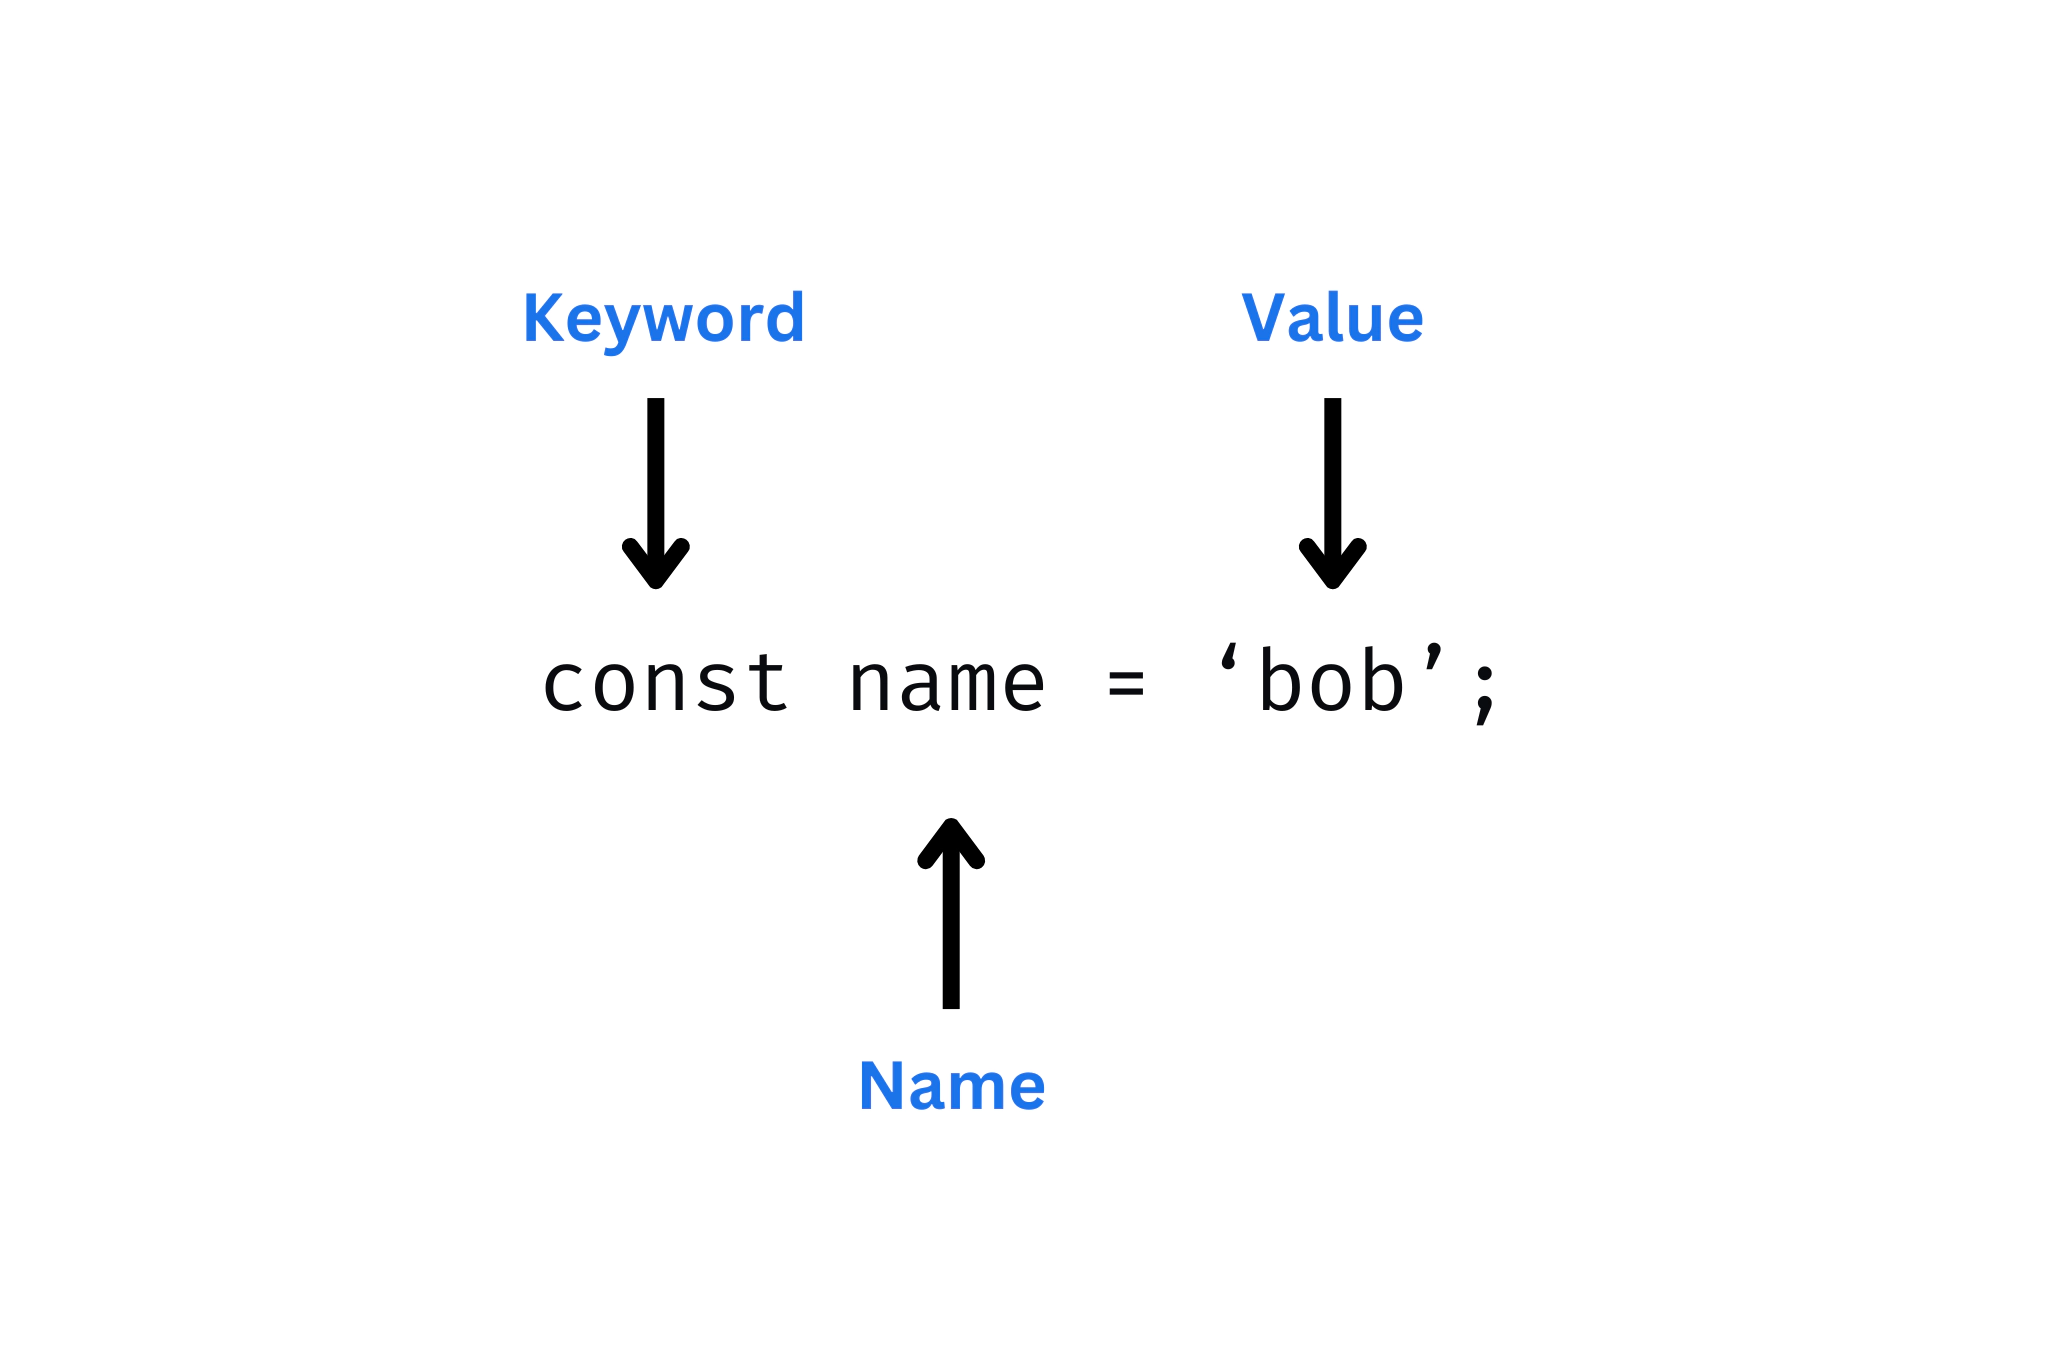
As you can see, every variable begins with a keyword. In this case, it is const, but we could have used let, or even var as well (but again, we’ll be avoiding the use of var). Next, we name the variable. Typically, we want the variable name to describe what it contains. The variable holds a value ‘Bob’, which is in fact a name, thus we chose the name… well, name. We could have named it almost anything, though, such as person, or even x. There are some reserved words, though – words that cannot be used as variable names.
Reserved Words
Speaking of reserved words, here’s a table for you. (Please don’t try to memorize them, you’ll get more acquainted with them as we go.) The words in the table below are reserved, which means you cannot use them to name a variable. They each have a very specific meaning, and are built-in.
| Reserved Words | |||
|---|---|---|---|
await |
default |
instanceof |
super |
break |
delete |
new |
switch |
case |
do |
null |
this |
catch |
else |
return |
throw |
class |
enum |
super |
true |
const |
export |
switch |
try |
continue |
extends |
this |
typeof |
debugger |
false |
throw |
var |
default |
finally |
true |
void |
delete |
for |
try |
while |
do |
function |
typeof |
with |
else |
if |
var |
yield |
enum |
import |
void |
|
export |
in |
while |
|
extends |
instanceof |
with |
Conditionals
Conditional statements are what we use to program some decision-making into our code. They indeed read very logical. Even if you’ve never seen one before, you could probably understand it. For example, take a look at the code block below.
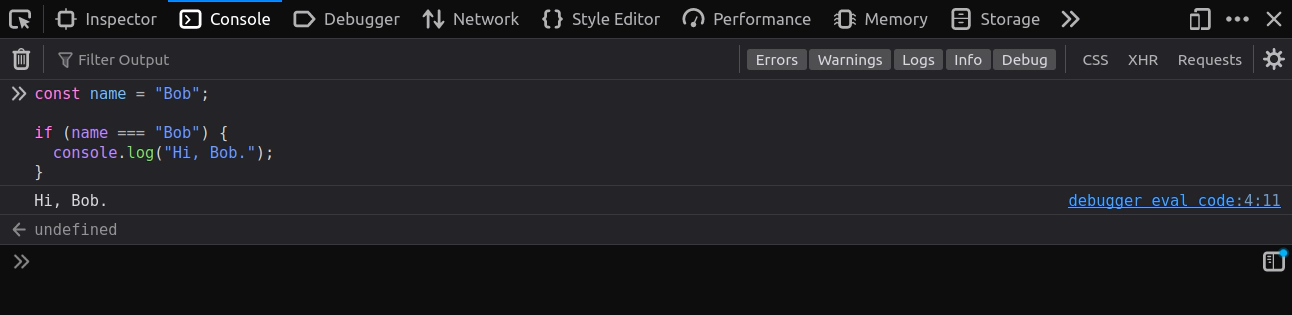
const name = "Bob";
if (name === "Bob") {
console.log("Hi, Bob.");
}
You can read it as it is. If name is equal to Bob, alert ‘Hi, Bob’. name is indeed equal to Bob, so the console.log() function will execute. console.log() is a built-in function that will display a message in your browser’s developer tools.
Now, in this case, name was indeed ‘Bob’, so body of the if statement was executed, logging ‘Hi, Bob.’ to the console. What if name wasn’t equal to ‘Bob’?
const name = "Susan";
if (name === "Bob") {
console.log("Hi, Bob.");
}
If you guessed that nothing would happen, you would be correct. name is not ‘Bob’, and therefore the code within the if statement will not execute. But what if we still wanted to display a message?
In that case, we can use an if-else statement, like so:
const name = "Susan";
if (name === "Bob") {
console.log("Hi, Bob.");
} else {
console.log("Hi, friend.");
}
Now the code reads as if name is equal to Bob, log “Hi, Bob.” to the console. Else, log “Hi, friend.” to the console. The code is a bit more complete now, as something will always return. In the case of the code above, “Hi, friend.” will be displayed in the console.
It gets better. What if we wanted to to have another conditional, to check for another specific value?
For that, there’s an else if statement, like so
const name = "Susan";
if (name === "Bob") {
console.log("Hi, Bob.");
} else if (name === "Susan") {
console.log("Hi, Susan.");
} else {
console.log("Hi, friend.");
}
What do you think will be displayed in the console?
“Hi, Susan” is correct.
Now, we can indeed nest as many else if statements within this code, but we can only have one else statement.
This is totally fine (although a bit redundant):
if () {
}
else if () {
}
else if () {
}
else if () {
}
else {
}
But this is not:
if () {
}
else {
}
else {
}
It’s also totally fine to use two if statements, like so:
if () {
}
if () {
}
You can also use the logical operators above in an if statement. Sometimes this is necessary. For example, you might need to check if someone is 18 or older and lives in the United States.
if (age >= 18 && country === "United States") {
  // do something
}
Switch Statement
Aside from if statements, there’s also something called a switch. Sometimes a switch can be a lot cleaner looking than a bunch of nested if-else statements. The syntax for a switch is like so:
const name = "Bob.";
switch (name) {
case "Susan":
console.log("Hello, Susan.");
break;
case "Steve":
console.log("Hello, Steve.");
break;
case "Bob":
console.log("Hello, Bob.");
break;
default:
console.log("Hello, friend.");
break;
}
This switch statement accomplishes the same thing as our if-else blocks above. However, both of these seem rather tedious in this context, no? When we get into the next lesson, you’ll learn about functions, which will really simplify this code.
Loops
Imagine you are in grade school for a moment and your teacher just caught you chewing gum in the classroom. As punishment, she tells you to type “I will not chew gum in class” one-hundred times in Microsoft notepad.
Of course, you can just copy and paste it, but as a programmer, you can just write a quick loop.
Loops essentially allow you to repeat some tasks – and they are helpful for avoiding repition. They’re especially useful for looping through arrays an objects as well (of which you will learn about in later lessons).
There are five types of loops available to use: while, do-while, for, for of, and for in.
Let’s take a look at each of them, starting with the while loop.
let i = 0;
while (i < 10) {
i++;
console.log(i);
}
The code reads as while i is less than 10, increase i by one and log i to the console.
If you execute this code in the console, you should see the following:

So, in short, the while loop executes while some condition isn’t met. In the block above, the while loop executes while i is less than 10. i is being incremented with each check. Replace the i in the code with the actual number value it should be, and perhaps it will become easier to reason about. For example, i’s starting value is 0, so the loop will look like:
while (0 < 10) {
  0++;
  console.log(0);
}
Note: ++ is essentially the same as + 1. We’re saying that the value should be incremented by one. So each iteration of the while loop is essentially adding 1 to the current number.
Next up on the list is the do-while loop. This loop isn’t very common in codebases, although it’s good to know about it, at least, so lets see what it does.
let count = 0;
do {
console.log('The count is ' + count);
count++;
} while (count < 5);
As you might have guessed, this block of code does something while a condition isn’t met.
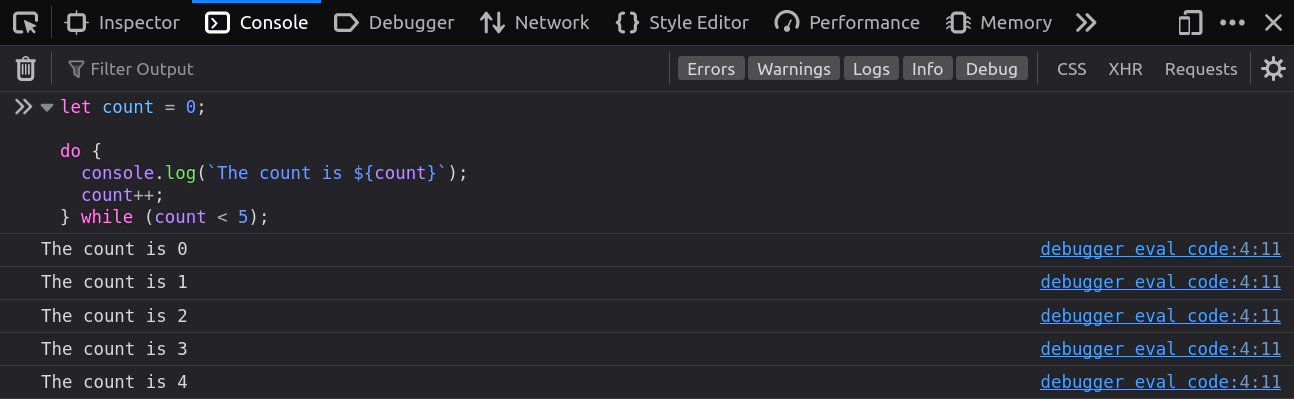
It reads exactly as it looks: do: log the count to the console and increment count while count is less than 5. Again, do-while loops aren’t heavily used, although it doesn’t hurt to know what they are (there’s also nothing wrong with using them).
Next up is the for loop, which probably took me the most time to wrap my head around when I first started programming ~10 years ago. So I will my absolute best to make it much easier for you to understand.
Essentially, a for loop in is a control flow statement that allows you to execute a block of code a specific number of times. It consists of three main parts: the initialization, the condition, and the expression.
for (initialization; condition; expression) {
  // do something
}
The initialization part is executed only once. The condition is evaluated before each iteration of the loop, continuing if the condition returns true, or stopping if the condition returns false. The expression is typically used to update the counter variable (initialization).
Now that we have some of the terminology out of the way, let’s see what a for loop actually looks like.
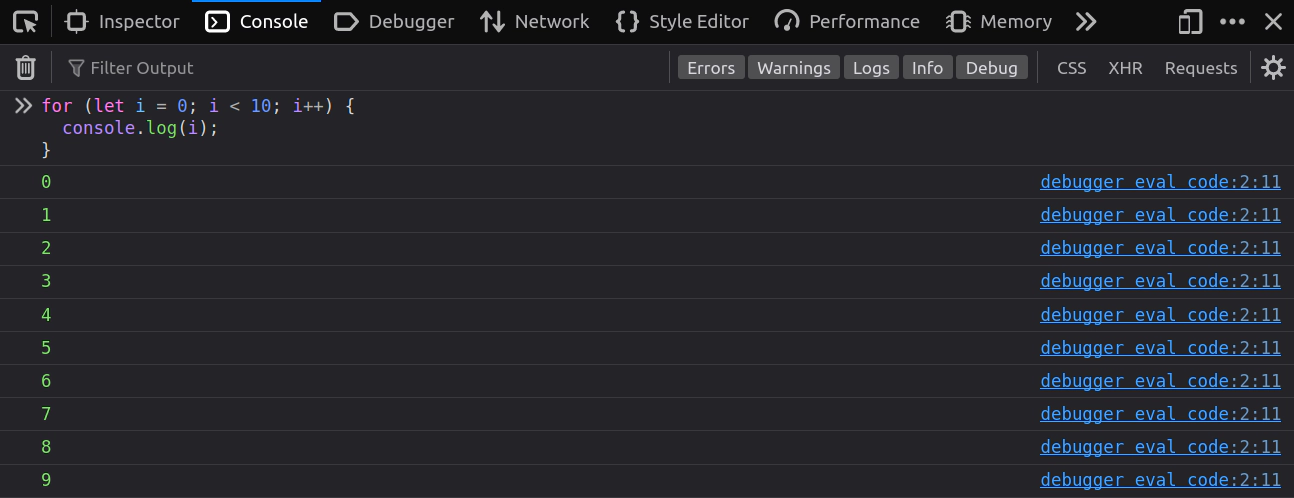
for (let i = 0; i < 10; i++) {
  console.log(i);
}
Lets walk through what is actually happening step-by-step per each iteration.
On the first iteration, i is being initialized to 0. Then the condition is checked: is 0 < 10? 0 is indeed less than 10, so console.log(i); is executed next. After the log happens, i is incremented (i++), with the new value being 1. This process repeats until i is no longer less than 10.
There’s nothing really new in the code block. You have seen most of it in previous code blocks. Try to imagine it as a while loop. Can you rewrite this for loop using a while loop?
Basically, you can do the same with a while loop with the following:
let i = 0;
while (i < 10) {
console.log(i);
i++;
}
The for of loop is perhaps my favorite, as it really simplifies the regular for loop. It’s extremely helpful for looping through arrays, of which we will not be discussing fully in this lesson, but will get a quick intro to them now.
An array stores lists of items. These items can be any data type – numbers, strings, Boolean values, etc. You can think of them as buckets of data, essentially.
The basic syntax of an array in JavaScript looks like this:
const people = [];
This is an empty array, declared with const, and named people. We could have given this array nearly any name. It is set equal to brackets [], which is where data will be stored.
To add some data to it, let’s give it a list of names:
const people = ["Bob", "Susan", "James", "Kristina"];
As you can see, each name in the array is a string. Each string is separated by a comma.
What if we wanted to log every item in this array to the console? Well, we can do that a few different ways. First, we can simply use console.log() statements:
console.log(people[0]); // Bob
console.log(people[1]); // Susan
console.log(people[2]); // James
console.log(people[3]); // Kristina
Note: Array elements are accessed by using brackets like above. console.log(people[0]) is saying “log the element at index 0 to the console”.
And that indeed works, but what if there were 100+ names in the array? Could you imagine typing all of those log statements for each name?
We can simply use a loop:
for (let person of people) {
  console.log(person); // Bob, Susan, James, Kristina
}
Introducing the array quickly was just to show you the for of loop. As you can guess, it logs the name of each person in the array to the console. We could have called person anything (aside from those reserved words). This greatly simplifies the for loop you learned about earlier, making the loop much easier to read.
Looping through the array using the traditional for loop would look like this:
for (let i = 0; i < people.length; i++) {
  console.log(people[i]);
}
There’s definitely a bit more to that, eh? For now, you don’t have to worry about that odd syntax, as we’ll be explaining it in more detail later. Just note the difference in each of these for loops.
The last loop we’re going to look at is a loop specifically designed for working with objects: the for in loop.
const obj = {
  name: "Bob",
  age: 30,
  career: "Software Engineer",
};
for (let prop in obj) {
console.log(obj[prop]); // Bob, 30, Software Engineer
}
Now, reiterating on the note in the introduction, we briefly showed you this object just to demonstrate the for in loop. Feel free to come back to this lesson after learning about objects and arrays.
More built-in functions
So far you have been seeing a lot of console.log statements. There are plenty more built-in functions, some of which you have most certainly encountered while browsing the web. One such example is the alert() function:
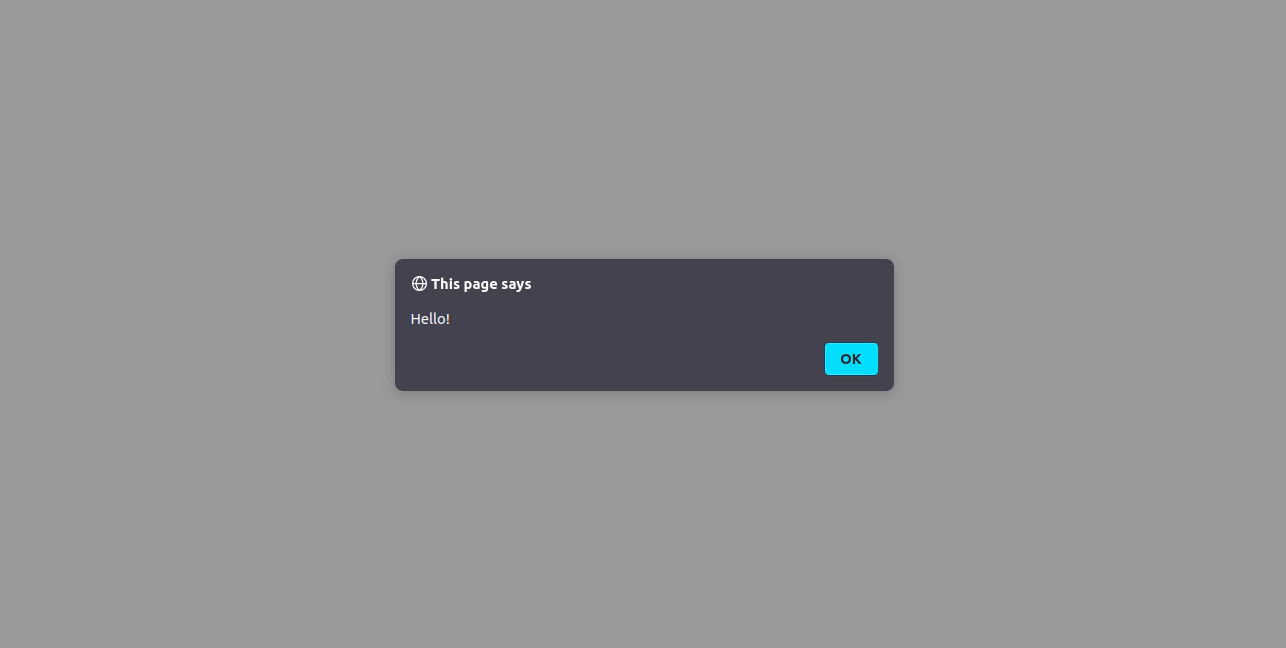
You can try it out by typing alert() into your console. Some more functions you might want to try include prompt() and confirm(). Give them a try!
Check Your Understanding
To reinforce your learning, take a moment to answer the following questions:
- What keywords can be used to declare variables?
- What is a reserved keyword?
- What does a loop allow you to do?
- True or false: You should always declare variables using the var keyword.
Reflecting on these questions will help solidify your understanding and prepare you for applying the concepts in practice.
In the next lesson, we’ll be exploring everything about objects!